
In this article, we will change the Checkout Region field to a State Field. We will then use a template override to move the Zip Code field to after the City and State fields on our Order form.
Change the Region Field to a State Field
The Region field is a special field which can be shown on our Checkout form and Order form. Here we will use US State names as values for our Region field. We can then use a language override to change the word Region into State.
Set up State Names for our Region field
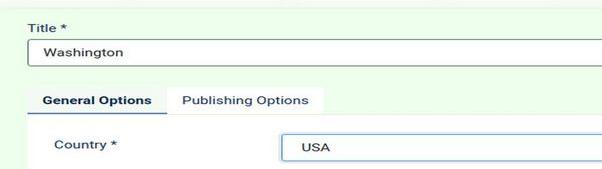
Regions must be assigned to a particular country. Therefore, before we can create new regions, we first need to create a country. Go to Phoca Cart Control Panel and click Countries. Then click New and add a country called USA. Then click Save and Close. Next, click Regions, New. For Title, type Washington. For Country, select USA:
Click Save and New. Then add Oregon and California. Then click Save and Close. Then place the States in alphabetical order:
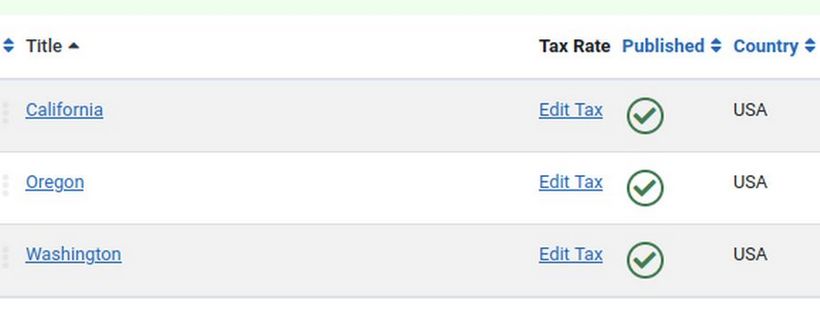
Note that each state can have a different tax rate. However, we will leave all states set for a 0 tax rate.
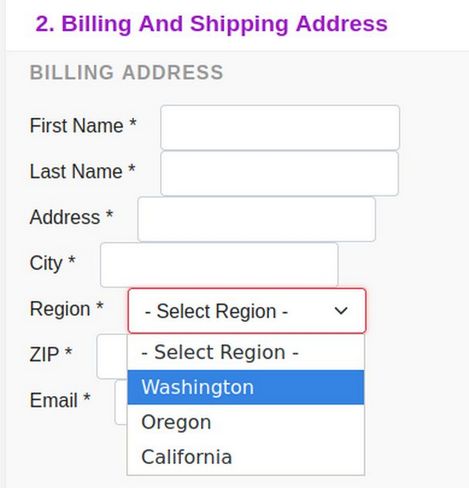
Next, go to the Shopping Cart and verify that the three states are shown in the drop down field:
Change the Name Region to State
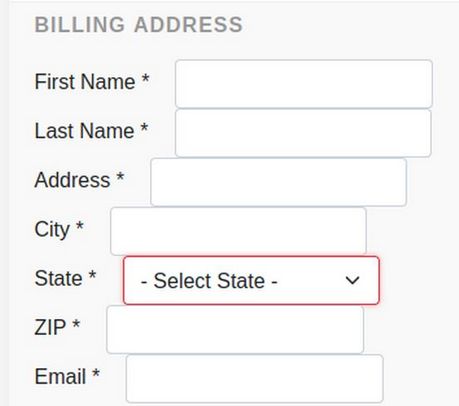
We will use a Language Override to change the name Region to State. Go to System, Manage, Language Overrides, New. Search for the value called Region. Then change the Text from Region to State. Then click Save and Close. Then click New and search for the value Select Region. Change the value to Select State. Then click Save and Close. Then view the Checkout page again:
We still have to add all of the 50 states as values to the Region field. But when done, we have an order form customized for any store in the Unites State.
Change the Zip Code to come after the City and State on our Order Form
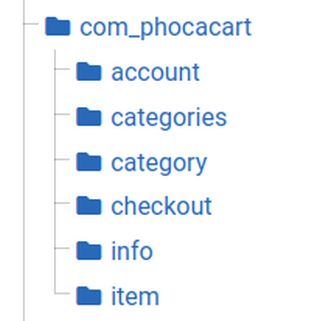
A more difficult problem is that the Zip Code field still comes BEFORE City and State on the default Order and Invoice forms associated with each Order. This will require a Template Override. Go to the Home Dashboard and click Templates, Code. Then click on the Helix template to edit it. Then click on the html folder and the com_phocacart folder:
Sadly, the folder we need to change is not listed. We need the layout folder which has this file: com_phocacart/layouts/order.php. We will therefore need to do a manual template override.
How to do a Manual Template Override
A template override allows us to alter the content of any part of our website in a way that the change is preserved even when the original or default code is updated. Click Create Overrides.
Normally you would select the Component or Layout you want to change and it will put a duplicate of the component or layout inside the html folder. Then click on this duplicate file and make whatever changes you need. Sadly, the folder and file we need to change is not here. Thankfully, it is still possible to create an override. But we need to take a couple of additional steps..
Step 1 Create a manual Template Layouts Override folder
To customize the output of the Phoca Cart Order form, we need to copy the following file: components/com_phocacart/layouts/order.php
TO:
templates/your_default_template/html/layouts/com_phocacart/order.php
Go to Dashboard, Templates Code and click on the Helix template to edit it. Click on the html folder to open it. Then click on the layouts folder to see these folders:
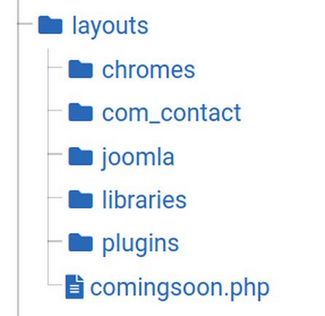
There is no com_phocacart folder in the html/layouts folder. We will therefore need to create an html/layouts/com_phocacart folder.
Click Manage Folders. For Folder Name, type com_phocacart. Then click on the html/layouts folder to select it. Then click Create.
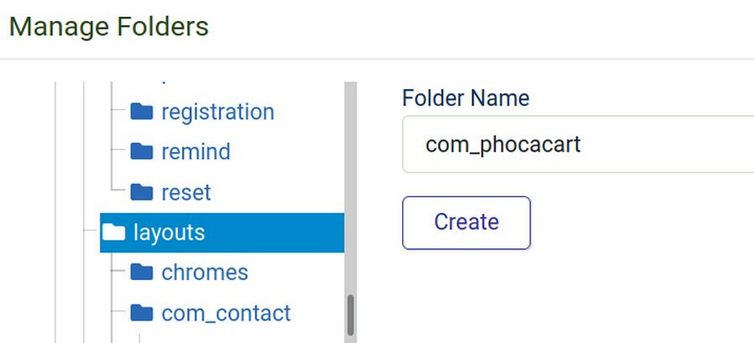
Now when you click on the html/layouts folder, you will see a folder called com_phocacart.
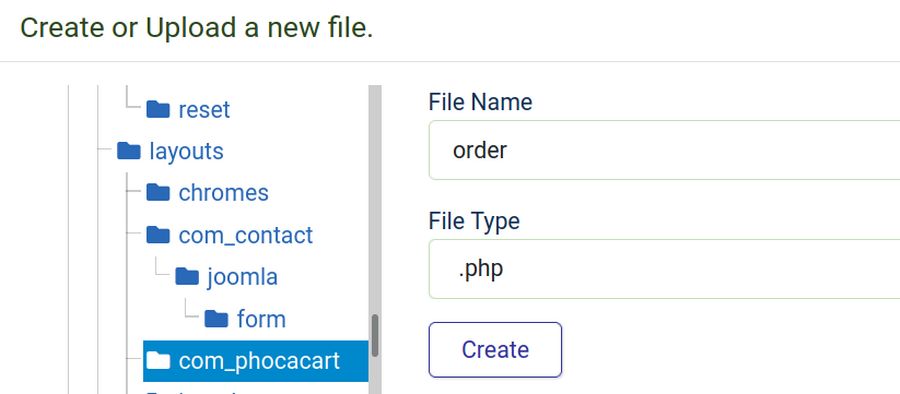
Step 2 Create a file called order dot php in your layouts Override folder.
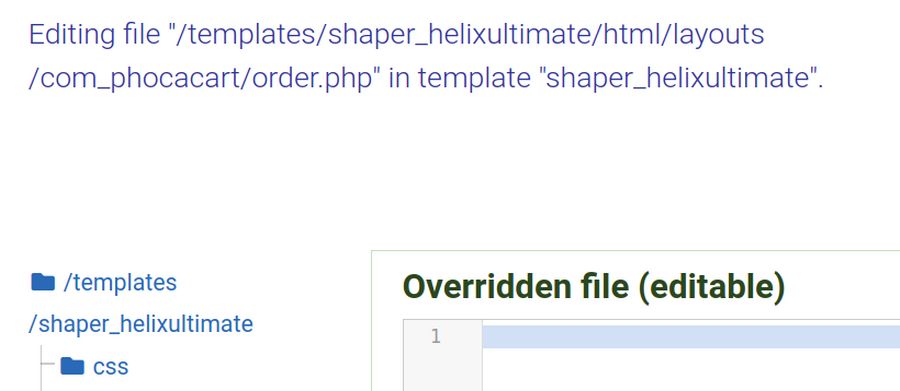
Click New File. For file name, type order. For File Type, select PHP. Then click on the html/layouts/com_phocacart folder to select it. Then click Create:
This will open the empty order.php file in your Template Code Edit screen:
Step 3 Copy the com_phocacart/layouts/order.php file to your clipboard
In your Home computer file manager, open your website extensions folder and extract the com_phocacart folder. Then open it. Then open the packages folder. Then extract the com_phocacart folder again and open it. Then open the site folder. Then open the layouts folder. Scroll down the screen and open the order.php file with your Bluefish Code Editor. Select all and copy to place this entire file in your Clipboard. Then close the file and close your File Manager. Then place your cursor at Line 1 of the Overridden File screen. Then right click and paste. Then click File Save.
Step 4 Change the order dot php file in two places
Scroll down to Line 424 to line 430 (billing address section) to see the following lines:
$city = array();
if ($v['zip'] != '') { $city[] = $v['zip'];}
if ($v['city'] != '') { $city[] = $v['city'];}
if (!empty($city)) {$ob[] = implode("\n", $city).'<br />';}
//echo '<br />';
if (!empty($v['regiontitle'])) {$ob[] = $v['regiontitle'].'<br />';}
if (!empty($v['countrytitle'])) {$ob[] = $v['countrytitle'].'<br />';}
Copy the following lines to your Clipboard. Then select and replace the above lines with the following lines:
$city = array();
if ($v['city'] != '') { $city[] = $v['city'];}
if (!empty($city)) {$ob[] = implode("\n", $city);}
if (!empty($v['regiontitle'])) {$ob[] = $v['regiontitle'];}
if (!empty($v['zip'])) {$ob[] = $v['zip'];}
if (!empty($v['countrytitle'])) {$ob[] = $v['countrytitle'].'<br />';}
Make the same change at line 476 to 482 (shipping address section).
Then click Save and Close. Then click Close. Then click Components, Phoca Cart and click on Orders to view an Order form.
Billing and Shipping addresses on the default Order and Invoice forms are now City, State and then Zip all on one line.

Hide the Manufacturer and SKU Number on the Product View Page
There are a couple of problems with our Product Information page. When we assign a product to a manufacturer and give it an SKU number, both of these appear on the product information page.
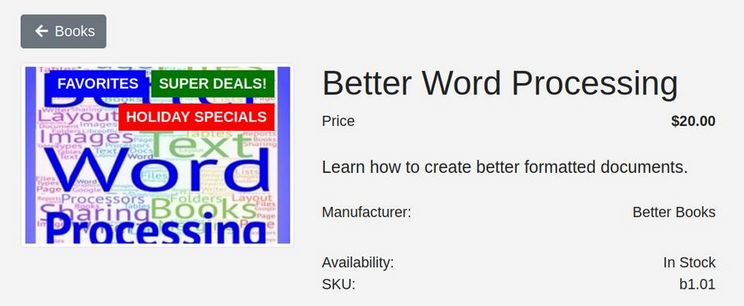
We really do not want either of these lines on the Product page.
Unfortunately, if we go to Options, Display and scroll down to Item View, there is no way to hide either the Manufacturer or the SKU number. One option is to not assign products to Manufacturers or give Products SKU numbers. But with a large store, with over 1000 products, we really need each product to be assigned to a Manufacturer and to have an SKU number. Therefore, we will use a template override to hide each of these on the Product View page.
Use Template Override to Hide Manufacturer
Click Dashboard, Templates Code. Then click on the Helix template to edit it. Then click Create Override. Then click on the html folder in the left side menu and click on the com_phocacart folder, then click on the item folder to open it. Then click on default.php.
To hide the manufacturer of all products, delete lines 261 to 270.
if (isset($x->manufacturertitle) && $x->manufacturertitle != '') {
echo '<div class="ph-item-manufacturer-box">';
echo '<div class="ph-manufacturer-txt">'.JText::_('COM_PHOCACART_MANUFACTURER').':</div>';
echo '<div class="ph-manufacturer">';
echo PhocacartRenderFront::displayLink($x->manufacturertitle, $x->manufacturerlink);
echo '</div>';
echo '</div>';
echo '<div class="ph-cb"></div>';
}
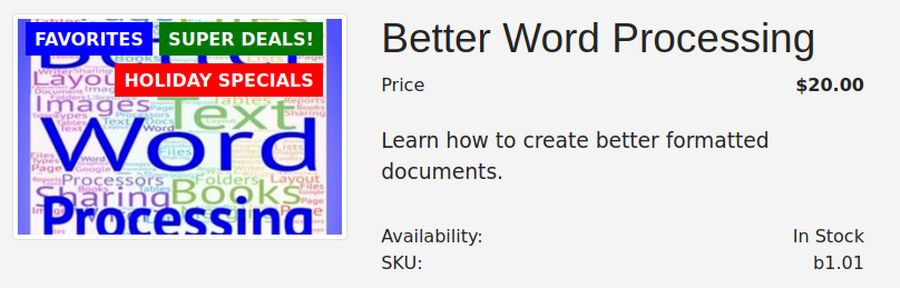
Then click Save and Close and view site. The manufacturer is now gone from all products.
Use CSS to Hide SKU Number
To hide the SKU on the Product pages. It is not clear which element is used for the SKU. So we will use Firefox to clarify this issue. Go to Tools, Web Developer, Inspector. Then click on the SKU line.
<div class="ph-item-id-box">
<div class="ph-item-sku-box"><div class="ph-sku-txt">SKU:</div><div class="ph-sku">111222555</div></div>
The easiest way to hide this is to use custom css to hide the outer box like this:
.ph-item-id-box {display: none;}
Copy and paste this into the end of our custom.css file.
You should now be able to pick any product and it will display in a simple manner.
Use Template Override to Simplify the Checkout Page
The Checkout page has a Log in Register section which might reduce sales as people may think they have to register to buy a product.
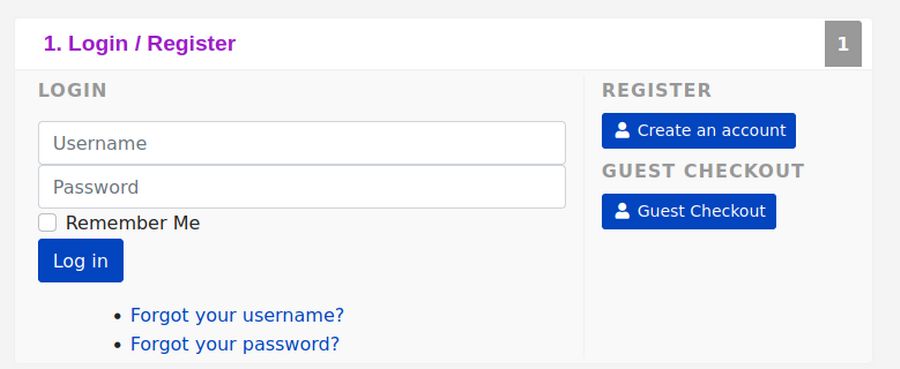
We can use a Template Override to hide or remove the Login section.
Go to Dashboard, Templates Code, Helix Template Details and click Override. Click on com-phocacart. Then click on checkout. Then click on html, com-phocacart, checkout. Then click on default_login.php
We will delete lines 26 to 62
if($this->a->login == 0) {
$d['status'] = 'pending';
/*require_once JPATH_SITE.'/components/com_users/helpers/route.php';
jimport( 'joomla.application.module.helper' );
$module = JModuleHelper::getModule('mod_login');
$mP = new JRegistry();
$mP->loadString($module->params);*/
$lang = JFactory::getLanguage();
$lang->load('mod_login');
echo '<div class="'.$this->s['c']['row'].' ph-checkout-box-row" >';
echo '<div class="'.$this->s['c']['col.xs12.sm12.md12'].' ph-checkout-box-header" id="phcheckoutloginedit">'.$layoutI->render($d).'<h3>'.$this->t['nl'].'. '.JText::_('COM_PHOCACART_LOGIN_REGISTER').'</h3></div>';
echo '</div>';
echo '<div class="'.$this->s['c']['row'].' ph-checkout-box-action">';
echo '<div class="'.$this->s['c']['col.xs12.sm8.md8'].' ph-right-border">';
$d = array();
$d['s'] = $this->s;
$d['t'] = $this->t;
echo $layoutUL->render($d);
echo '</div>'. "\n";// end checkout_login_row_item_login
echo '<div class="'.$this->s['c']['col.xs12.sm4.md4'].' ph-left-border">';
$d = array();
$d['s'] = $this->s;
$d['t'] = $this->t;
echo $layoutUR->render($d);
Then also delete lines 44 through the closing bracket at the beginning of line 49.
echo '</div>'. "\n";// end checkout_login_row_item_register
echo '</div>'. "\n";// ph-checkout-box-action}
Then click Save and Close and view your site:
Use Language Override to Change Guest Checkout
Language overrides can be used to change words like Guest Checkout to Click Here to Check Out. Click on System, Manage, Languages Overrides. Click on English United Kingdom Site. Then click New.
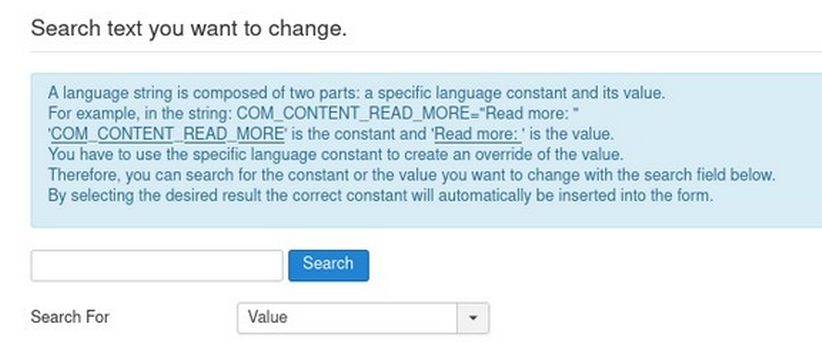
Type Guest Checkout in the Search box. Then click Search. Then scroll to the bottom and click Show More. There are two values that need to be changed

Click on the bottom option first to select it.
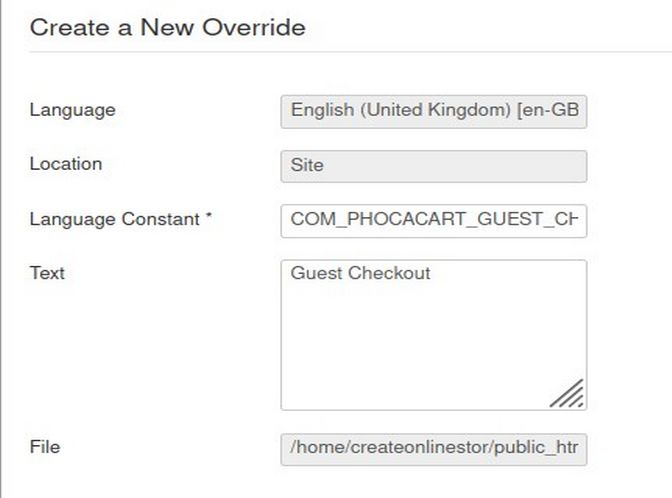
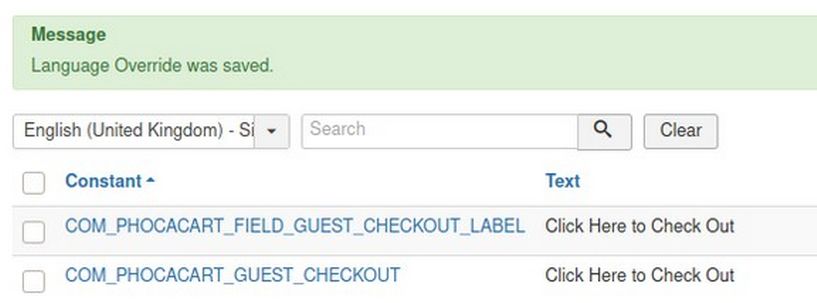
This will place the default value in a Text box in the upper left corner of the screen. Change this text to Click Here to Check Out. Then click Save and Close. Then click New. Then do the search again and click on the other value to change it. Then click Save and Close. The changes will now appear in a table:
Now view the Checkout page again.
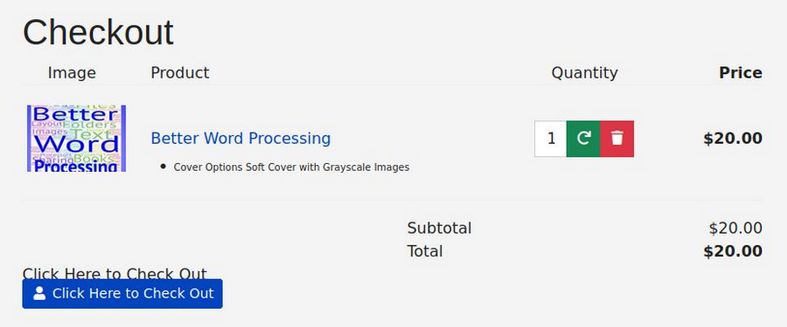
Hide the Duplicate Click Here to Check Out
It is odd to have one label hiding the other. Time to break out the Firefox inspector again. It shows the following classes:
<div class="ph-box-header">Click here to check out</div>
.ph-box-header {font-size: 10px;}
< class="btn btn-primary btn-sm ph-btn ph-checkout-btn-login">
ph-checkout-btn-login {margin-top: 16px;}
Add these lines to the end of our custom.css file:
.ph-box-header {font-size: 0px;}
.ph-checkout-btn-login {margin-top: 16px;}
Clear the browser cache and reload the page and load another product in the cart to view the cart:
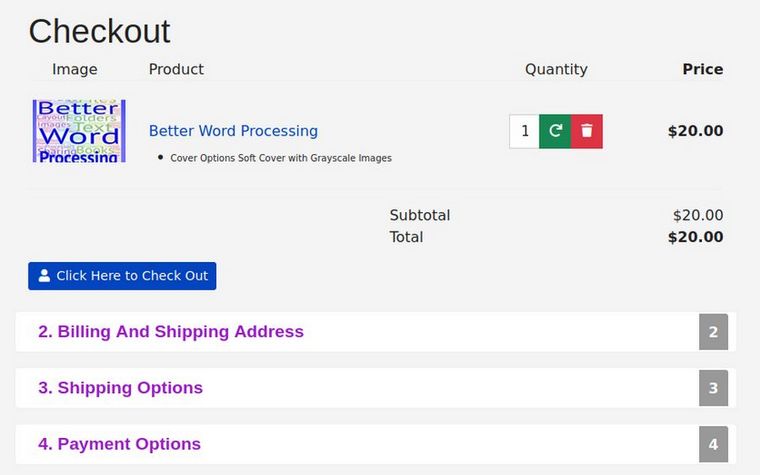
Then click on Click here to check out. and verify that the checkout form still works.
What’s Next?
In the next article, we will review how to customize the emails sent to customers after they have ordered a product.